Red Rods (Long Rods)
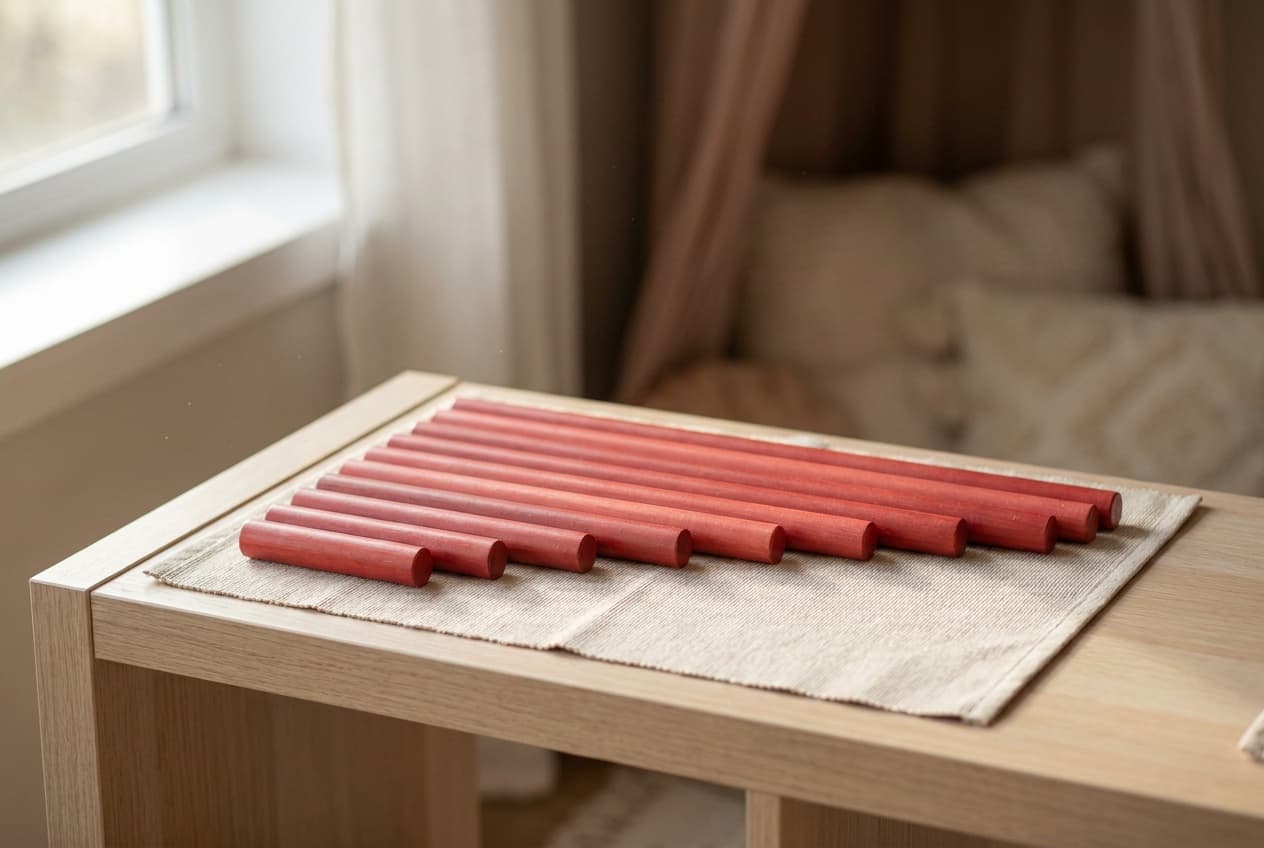
The red rods are ten wooden rods from 10 cm to 1 meter long, each 10 cm longer than the last. A child of about 3 lays them side by side on a rug, longest first, until they step down like organ pipes. Montessori found them the hardest of her three size materials, and they lead straight into the number rods.
Sourced from the texts, not yet presented at home
| Typical age | 3 to 5 years |
|---|---|
| Area | Sensorial |
| Before this | |
| Materials | |
| Direct aim | To see differences in length, with every other dimension held the same, and build a series of ten. |
| Control of error | The child's eye. A rod out of order breaks the even run of steps along the right-hand ends, which shows when the child runs a hand down them. The 1912 book calls that broken line a very evident control, but nothing in the rods stops a mistake, and Montessori saw more mistakes here than with the tower or the stair. |
| Leads to | |
| Time | About 10 minutes to present (our estimate). The 1 m rod alone takes a slow, careful carry. |
| Grouping | One child. A second child can fetch rods on request once both know the work. |
| Parent prep | Medium. A rug at least 1.2 m long, or a clear stretch of bare floor. |
| Cost | Buy about $59 to $183. Make: possible to make with some effort. |
| Other names | Long rods, Long stair, Rods for length |
What the work teaches
Direct aim. To see differences in length, with every other dimension held the same, and build a series of ten.
Indirect aims, the ones you will not see at once
- Control of movement while carrying a 1 m rod across a room without touching anything
- Preparation for the number rods, which are the same ten lengths painted in red and blue sections
- Preparation for measuring: the shortest rod fits along every other rod a whole number of times
- Words for length: long and short first, then the comparatives and superlatives
Set it out before you invite the child
Current sets are ten rods painted red, 2.5 cm square in section, from 10 cm to 100 cm in 10 cm steps. Those are the sizes Montessori Outlet lists.
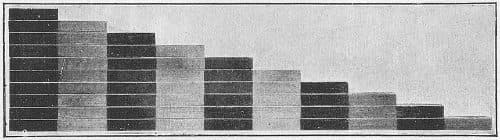
Montessori's own rods were not plain red. Her 1912 rods had faces of 3 cm and every 10 cm section painted alternately red or blue. Her 1914 handbook gives a 4 cm square section and paints the rods either green or in red and blue sections.
The all-red set is the later tradition. The red and blue version became the number rods, so a modern shelf has the same ten lengths twice.
A long rug or a bare floor. Laid side by side, the ten rods cover a patch about 1 m long and 25 cm wide.
Store the rods flat on a low shelf or in a rack, longest at the back, where the child can lift each one without moving the others.
Presentation, step by step
- 1Unroll a long rug. Carry the rods one at a time. Hold a short rod in one hand; hold a long rod level at both ends and walk slowly.
- 2Lay the rods on the rug in no order, all pointing the same way.
- 3Find the longest rod. Lay it along the near edge of the rug with its left end at the edge.
- 4Find the next longest by eye. If you're unsure between two, lay them side by side, left ends together, and look along them. Place the longer one beside the first.
- 5Carry on down to the 10 cm rod, keeping every left end on the same line.
- 6Run a hand down the right-hand ends, one step at a time, from the longest rod to the shortest.
- 7Mix the rods and invite the child to build the stair.
- 8Carry the rods back to the shelf one at a time, then roll up the rug.
Details that hold the child's attention
Carrying the 1 m rod the length of a room without touching a chair.
The 10 cm rod walked down the stair, fitting each step exactly.
Ten of the 10 cm rod would lie end to end along the 1 m rod. The longest is ten times the shortest.
The straight line of left ends, which makes the steps show on the other side.
How the child sees a mistake
The child's eye. A rod out of order breaks the even run of steps along the right-hand ends, which shows when the child runs a hand down them. The 1912 book calls that broken line a very evident control, but nothing in the rods stops a mistake, and Montessori saw more mistakes here than with the tower or the stair.
The words come after the hands
| Words | Shown with |
|---|---|
| long, short | The 1 m rod and the 10 cm rod, given first as a pair. |
| longer, shorter | Any two rods side by side. |
| longest, shortest | The ends of the series, used when the child picks from the scattered pile. |
| rod | The object itself. Name it any time. |
The three-period lesson, scripted
You need the 1 m rod and the 10 cm rod, once the child builds the stair alone.
| Period | What you do and say |
|---|---|
| 1. Naming | Hold up the longest: "This is long." Then the shortest: "This is short." Say each a few times. |
| 2. Recognition | "Give me the long one." "Give me the short one." Change their places and ask again. |
| 3. Recall | Point to one and ask "What is this?" The child answers "Long" or "Short." |
Montessori's handbook keeps long and short for objects where only length changes. The 1912 book then takes away the two end pieces and repeats the lesson with the pieces now at the ends, until every piece has had a turn.
Extensions and variations
- Fetching a rod from across the room on request: "Bring me the rod that is a little shorter than this one"
- Building the stair with the rods standing against a wall
- Making the 1 m length again from two rods laid end to end: 9 and 1, 8 and 2, 7 and 3, 6 and 4. Montessori gave this game with the sectioned rods as the first addition within ten
- Measuring a table or a doorway in 10 cm rod lengths
- Combining the rods with the pink tower and the brown stair in patterns on the floor
Variations
- Three-period lesson with long and short, then the comparative and superlative forms
Make it or buy it
| Material | Make it | Buy, approx. |
|---|---|---|
| Red Rods | With effort | $59 to $183 |
| Work Rug | Easy | $10 to $20 |
Prices noted . Approximate US street prices for home-use versions; they vary by maker and change often, so recheck before buying.
Making it at home
Ten lengths of 2.5 cm square timber cut in 10 cm steps up to 100 cm. Sand them and paint them red. Accurate cuts matter more than the wood.
What to check when buying a set
Look for straight rods with clean square ends and an even finish. If the number rods are already on the shelf, they can do the length work too.
Printables for this age
This work needs only the material, so it has no printable of its own. The shelf plan below places it among the other works for the same age.
- Shelf plan for age 3PDF, 1 page, 250 KBEvery work for this age on one page, in order, with a column to date each presentation.
Every printable for one age, by email
The shelf plan and the lesson printables for your child's age in one email, then three short emails on the first lesson, what to make or buy, and what comes next.
Signs the child is ready, and signs it is done
Ready for the first presentation
- Builds the brown stair with no misplaced step.
- Carries something long, like a broom, through a room without bumping into things.
- Watches an adult show a work from start to finish without reaching in.
- Puts a material back the way it came out.
Ready for the next lesson
- Builds the stair from scattered rods with every left end in line.
- Spots and fixes a rod out of order without being told.
- Uses long and short correctly, and later the comparatives.
- Picks out, by eye, the rod that's one step shorter than any rod you hold up. That's the cue for the number rods.
Fitting it into a home, not a classroom
| If you have | Do this |
|---|---|
| A small apartment | The finished stair needs a strip about 1.2 m by 0.5 m. A hallway floor works, and so does a bath towel on a bare floor. |
| A toddler sibling | To a 2-year-old the 1 m rod is a stick for swinging. Present while the toddler naps, and store the rods behind a door or up high between turns. |
| A tight budget | Red rods are one of the easier Sensorial materials to make: ten lengths of square timber cut accurately and painted red. The material page has a cut list. |
| Number rods already on the shelf | Use them for the length work too. Montessori's 1912 school had one set of red and blue rods, used first for length and later for counting. |
When it does not go to plan
| When | Try this |
|---|---|
| The child keeps swapping two neighboring rods. | Leave it. Montessori saw children make the most mistakes with the rods and get them right only after the tower and the stair were perfect. Present again on another day. |
| A rod gets swung like a sword. | End the turn calmly and put the rods away together. Montessori aimed her corrections at rough use of the material, not at mistakes in the order. |
| The left ends drift, so the steps don't show. | Show again with one slow move: slide each new rod until its end touches the edge of the rug. |
| The child carries three rods at once. | Show the one-rod carry again, the long rods held level at both ends. The carrying is part of the work. |
Hazards to check before each session
A 1 m rod waved in a room can hit an eye or a younger child. Show the level, two-hand carry, and stop the work if a rod is swung.
Clear the route between shelf and rug of lamps, table corners and toys before the first carry.
Where other sequences and standards place it
We have not bought the paid homeschool curricula, so they are not listed here.
| Framework | Where it sits |
|---|---|
| This site's Sensorial sequence | Lesson 5 of 12 published, after Brown Stair (Broad Stair), before Binomial Cube and Number Rods. Checked in: the scope and sequence |
| Montessori, The Montessori Method (1912) | Second grade, with the cubes and the prisms. Montessori found the long stair the most difficult of the three, arranged perfectly only after the other two were free of errors. Checked in: Chapter XX, Sequence of Exercises |
| Montessori, Dr. Montessori's Own Handbook (1914) | The third of the three sets of solids that follow the cylinders: cubes, prisms, rods. The rods are green or red and blue. Checked in: Sensory Education, Fig. 12 |
| Common Core, Kindergarten math | K.MD.A.2: directly compare two objects with a measurable attribute in common and describe the difference. Here the attribute is length, compared rod against rod. Checked in: tasks.illustrativemathematics.org |
| Head Start Early Learning Outcomes Framework, preschool | P-MATH 8: the child measures objects by their attributes and uses differences in attributes to make comparisons. Checked in: www.in.gov |
Red rods: questions parents ask
What do the red rods teach?
Length, with every other quality held still. All ten rods have the same square end, and only the length changes, in 10 cm steps from 10 cm to 1 m. The child learns to see a 10 cm difference and gets the words long and short. Montessori wrote that the rods' main use would come later, in arithmetic.
Are the red rods the same as the number rods?
Same ten lengths, different paint. Montessori's 1912 book has one set, with alternating red and blue sections, used first for length and then for counting. Modern sets split it in two: plain red rods for Sensorial, red and blue number rods for math.
What age are the red rods for?
Most albums give them at about 3, after the pink tower and the brown stair, and on this site they run from 3 to 5. Montessori found them the hardest of the three size materials, so a child still mixing up the tower's two biggest cubes can wait.
Can I make red rods at home?
Yes. They're ten lengths of square timber, cut from 10 cm to 100 cm and painted red. Cut to within a millimeter or two, or the stair steps unevenly. The material page has the cut list.
Sources cited by book and chapter
- Maria Montessori, The Montessori Method (1912)
Chapter XIII, Education of the Sense of Vision
Ten four-sided rods, the first a metre long and the last a decimetre, each decreasing by one decimetre, with each decimetre section painted alternately red or blue.
The child arranges the scattered rods by length; a misplaced rod alters the regular decrease of the stair along the hypotenuse, a very evident control of error.
This set of rods has its principal application in arithmetic: with it one may count from one to ten and take the first steps in the decimal and metric system.
Chapter XX, Sequence of Exercises
Children commit the greatest number of errors with the long stair and arrange it perfectly only after eliminating every error with the other two sets, so it is the most difficult of the three.
Chapter XV, Intellectual Education
In later nomenclature lessons the directress takes away the two extreme pieces and repeats the lesson with the pieces now at the extremities, until all the pieces have been used.
- Maria Montessori, Dr. Montessori's Own Handbook (1914)
Sensory Education, Fig. 12
Ten rods, colored green or alternately red and blue, with the same square section of four centimeters a side, varying by ten centimeters from ten centimeters to one meter, arranged on a carpet like a set of organ pipes.
Sensory Education
The teacher's corrections aim at rough or disorderly use of the material; when a child makes glaring mistakes with the long rods there is no need to intervene, since the aim is that he practise by himself.
Language and Knowledge of the World
When only one dimension varies, as with the rods, the objects are called long and short.
Arithmetic
In the material for length the shortest rod is the unit of measurement for all the rest, so the rods stand in the relation of the numbers 1 to 10.
After arranging the long stair, the child lays rod 1 next to the 9, rod 2 next to the 8 and so on up to the 5, which represents addition within ten.
Reviewed by
What to offer next
Once the child chooses this work unprompted and finishes it without help, the next lesson to prepare is Binomial Cube.
- Brown stair2.5 to 4.5 years
- Touch boards2.5 to 4.5 years
- Red rods3 to 5 years
- Color tablets3 to 5 years
- Sound cylinders3 to 5 years