Three-Part Cards: Land and Water Forms
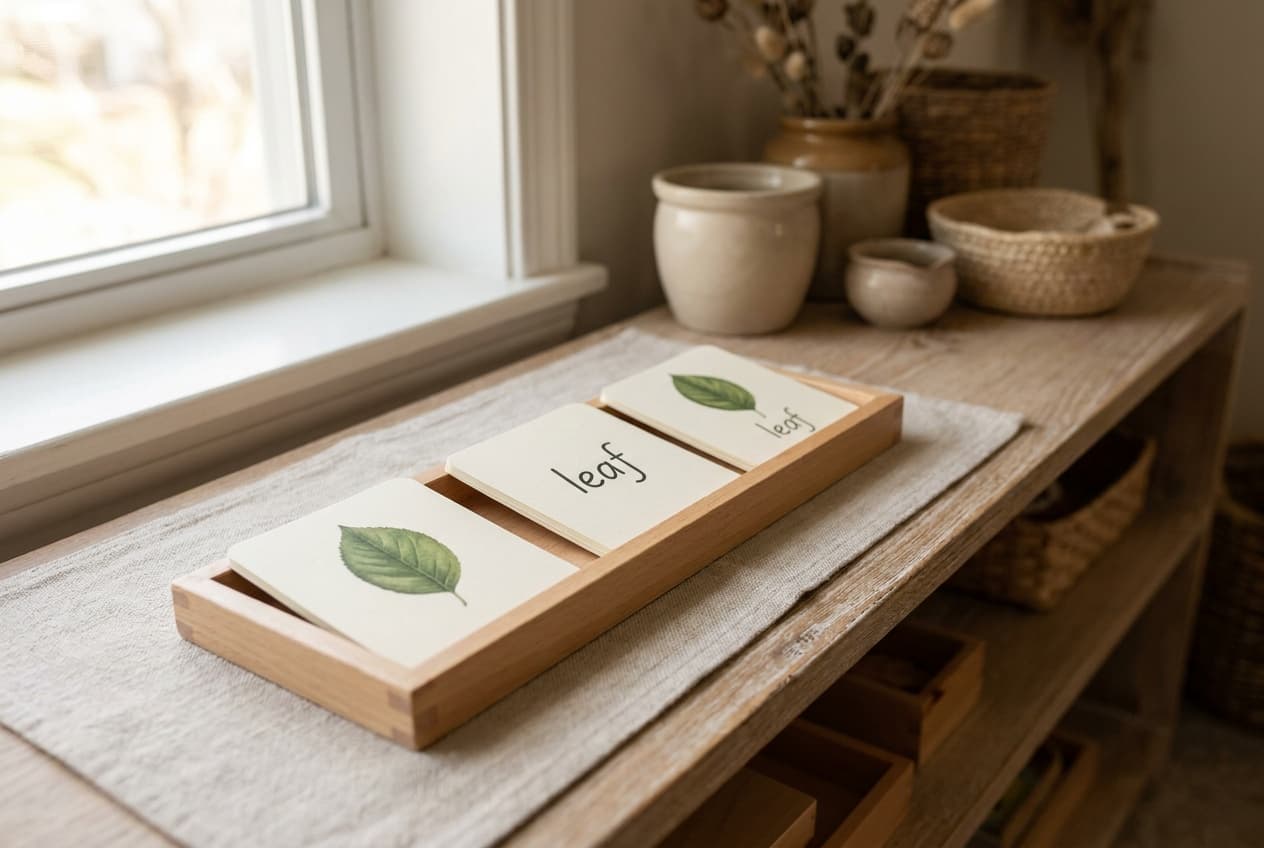
Three-part cards are a picture card, a label card and a control card showing both. A child who reads short words, often at about 4.5, lays out the pictures and places a label under each. The control cards check the work. The land and water forms make a good first set: island, lake and the rest are already familiar.
Sourced from the texts, not yet presented at home
| Typical age | 4 to 6.5 years |
|---|---|
| Area | Language |
| Before this | |
| Materials | |
| Direct aim | To read the names of familiar things, match each to its picture, and check the work alone. |
| Control of error | The control cards. Each shows picture and name together, so the child checks every match without help. A label under the wrong picture shows at once when the control card goes down. |
| Leads to | Later lessons in this line are in preparation. |
| Time | About 15 minutes for four pairs (our estimate). |
| Grouping | One child, or two taking turns |
| Parent prep | Low with bought or printed cards. A rug or a clear table. |
| Cost | Buy about $12 to $110. Make: easy to make at home. |
| Other names | Nomenclature cards, Classified cards, 3-part cards, Montessori cards |
What the work teaches
Direct aim. To read the names of familiar things, match each to its picture, and check the work alone.
Indirect aims, the ones you will not see at once
- Exact words for one field of knowledge, here geography
- Reading for meaning
- Keeping a set together by subject, which is the first classifying
- Checking against a control without asking an adult
Set it out before you invite the child
For each form, three cards: a picture card with no name, a label card with the name alone, and a control card with picture and name together. The land and water sets we found cover ten forms: island, lake, peninsula, gulf, isthmus, strait, cape, bay, archipelago and system of lakes.
Start with four pairs, from island and lake to cape and bay. The free printable on the land and water forms lesson has exactly those four.
Three-part cards are the later tradition. The 1912 book has the idea behind them: cards naming familiar objects, read and laid under the object. The 1917 book adds a geometry portfolio of figures with their names and short notes, for children to copy.
A rug or a table with room for three rows of eight cards.
Presentation, step by step
- 1Lay the picture cards in a row along the top of the rug, naming each one: island, lake, peninsula, gulf.
- 2Take the first label card. Read it slowly, sounding it out if needed, and lay it under the island picture.
- 3Hand the next label to the child to read and place.
- 4When every picture has its label, bring out the control cards.
- 5Lay each control card under its pair, picture to picture, and let the child see whether the word matches.
- 6Gather the cards back into three piles and put the set away.
Details that hold the child's attention
Reading peninsula, a long word, and finding its picture alone.
The control card that agrees, or the one that doesn't.
Island and lake side by side: the same outline, inside out.
The cards laid next to the real trays with water poured in.
How the child sees a mistake
The control cards. Each shows picture and name together, so the child checks every match without help. A label under the wrong picture shows at once when the control card goes down.
The words come after the hands
| Words | Shown with |
|---|---|
| picture card | The picture with no name. |
| label | The name with no picture. |
| control card | Picture and name together, for checking. |
| island, lake, peninsula, gulf | The first four names in the set. |
The three-period lesson, scripted
You need the island and lake picture cards, before any reading.
| Period | What you do and say |
|---|---|
| 1. Naming | "This is an island." "This is a lake." |
| 2. Recognition | "Show me the lake." "Give me the island." |
| 3. Recall | Point and ask "What is this?" |
Our suggestion: a child who doesn't read yet can work with the picture and control cards only, matching like to like. Labels come once the pink series is easy.
Extensions and variations
- Definition cards: a short sentence for each form, read and matched to the picture
- Laying the cards beside the trays with the water poured
- A booklet: the child draws each form and writes its name
- New sets on the same pattern: parts of a leaf, parts of a fish, tools in the kitchen
- Finding an island or a peninsula on a globe or a map
Variations
- Picture and control cards only, for a child who isn't reading yet
- Labels first: the child reads all the labels, then hunts for each picture
Make it or buy it
| Material | Make it | Buy, approx. |
|---|---|---|
| Three-Part Cards (Land and Water Forms) | Easy | $12 to $110 |
| Land and Water Form Trays | Easy | $37 to $144 |
Prices noted . Approximate US street prices for home-use versions; they vary by maker and change often, so recheck before buying.
Making it at home
Print the pictures and names, cut each control card whole and a second copy into picture and label. Laminate if the set will be used often.
What to check when buying a set
Printed sets cost little; wooden boxes and plastic cards cost more and last. Check that the pictures match your trays.
Printables for this lesson
- Three-part cards for land and water formsPDF, 4 pages, 207 KBThe four pairs from island and lake to cape and bay, one pair to a page, with picture, label and control cards. The same file as on the land and water forms lesson.
- Shelf plan for age 4PDF, 1 page, 248 KBEvery work for this age on one page, in order, with a column to date each presentation.
Every printable for one age, by email
The shelf plan and the lesson printables for your child's age in one email, then three short emails on the first lesson, what to make or buy, and what comes next.
Signs the child is ready, and signs it is done
Ready for the first presentation
- Reads the pink series labels without help.
- Has worked the land and water form trays with water.
- Knows at least four form names by ear.
- Lays cards in a straight row.
Ready for the next lesson
- Labels four pairs without help and checks them with the control cards.
- Reads the labels silently.
- Asks for the next set.
- Uses the form names when looking at maps.
Fitting it into a home, not a classroom
| If you have | Do this |
|---|---|
| A tight budget | Print them. A free set comes with the land and water forms lesson; card stock and scissors do the rest. |
| A child who doesn't read yet | Use the picture and control cards only. Matching picture to picture is the same layout, minus the reading. |
| Two children | One reads a label aloud and the other places it. Then swap. |
| Any subject the child loves | Make a set of six to ten cards on whatever the child loves, such as birds. Keep each set to one subject. |
When it does not go to plan
| When | Try this |
|---|---|
| The child matches by guessing. | Keep the control cards out of sight until the end, and include forms that look alike, such as cape and peninsula. |
| Too many cards at once. | Four pairs at most. Add the rest a pair at a time. |
| Labels end up in a heap. | Show again: each label goes directly under its picture, edges touching. |
| Interest fades after one round. | Keep the pattern and change the subject. A new set feels like new work. |
Hazards to check before each session
Round the corners of laminated cards with scissors; square laminate corners are sharp.
Where other sequences and standards place it
We have not bought the paid homeschool curricula, so they are not listed here.
| Framework | Where it sits |
|---|---|
| This site's Language sequence | Lesson 6 of 12 published, after Pink Series: Object Box Reading and Land and Water Forms. Checked in: the scope and sequence |
| Montessori, The Montessori Method (1912) | Reading: cards naming well-known objects, read and placed under the object. Checked in: Chapter XVII, Reading |
| Montessori, The Montessori Elementary Material (1917) | Design: a geometry portfolio of figures with short explanations and their names, which children copy. Checked in: Part V, Linear Geometric Design |
| Common Core, Kindergarten language | L.K.5.a: sort common objects into categories (e.g., shapes, foods) to gain a sense of the concepts the categories represent. Checked in: corestandards.org |
| Common Core, Grade 1 language | L.1.5.b: define words by category and by one or more key attributes, which is what the definition cards ask. Checked in: corestandards.org |
Three-part cards: questions parents ask
What are three-part cards?
Sets of three cards for each word: a picture, a label, and a control card with both. The child matches labels to pictures and checks against the control. One set covers one subject, such as land and water forms.
How to use Montessori three part cards?
Lay the pictures in a row, read each label and place it under its picture, then lay the control cards beneath to check. With a child who doesn't read yet, match the pictures to the control cards instead.
What are nomenclature cards in Montessori?
Another name for three-part cards. Nomenclature means a set of exact names, and Montessori gave great weight to it: an exact word joined to a clear idea, with no other words around it.
What are Classified Cards in Montessori teaching?
Picture cards grouped by subject, such as animals or land forms, often for children who don't read yet. Three-part cards add the label and the control card once reading begins.
Sources cited by book and chapter
- Maria Montessori, The Montessori Method (1912)
Chapter XVII, Reading
Each reading card carries a well-known word naming an object that is present, and when the child has read the word he places the card under the object whose name it bears.
Chapter XV, Intellectual Education
Lessons in nomenclature consist simply in provoking the association of the name with the object, so no other word besides the name should be spoken.
Nomenclature is one of the most important phases of education because it prepares for exactness in the use of language.
- Maria Montessori, The Montessori Elementary Material (1917)
Part I, Grammar
In the Children's House the children placed a card bearing the name of an object on the object, the first lesson in reading; the child could read as soon as he identified the object named on the card.
Part V, Drawing
The geometric material includes a portfolio of pages reproducing the figures with brief explanatory sheets containing their nomenclature, which the child may copy.
Part VII, Geography
In outdoor building games children make a lake, an island, a peninsula and a river.
- Maria Montessori, Dr. Montessori's Own Handbook (1914)
Language and Knowledge of the World
The botanist sees in every plant the qualities classified in his mind and gives it its exact name, and exact language characterizes the trained observer.
Reviewed by
What to offer next
Once the child chooses this work unprompted and finishes it without help, the next lesson to prepare is Blue Series: Words with Consonant Blends.
- Metal Insets3.5 to 6 years
- Pink series4 to 6 years
- Three-part cards4 to 6.5 years
- Blue series4.5 to 7 years
- Grammar symbols4.5 to 7 years