Sandpaper Letters
Sandpaper letters teach a letter's sound and the movement of writing it at the same time. Each letter is cut from fine sandpaper and mounted on a smooth board; the child traces it with two fingers and says the sound, /m/ rather than "em". Children start from about 3, after plenty of spoken sound games.
Sourced from the texts, not yet presented at home
| Typical age | 2.5 to 5 years |
|---|---|
| Area | Language |
| Before this | Nothing. This lesson can come first. |
| Materials | |
| Direct aim | To associate each letter shape with its sound, and to learn the movement used to write it. |
| Control of error | The rough surface. A finger that strays off the letter feels the smooth board right away. |
| Leads to | |
| Time | About 5 minutes for two or three letters (our estimate). Short is better; a new pair can come the next day. |
| Grouping | One child, sitting beside you at a table |
| Parent prep | Low once the set is bought or made. Pick the two or three letters before you sit down. |
| Cost | Buy about $32 to $113. Make: possible to make with some effort. |
| Other names | Sandpaper alphabet, Tactile letters, Sandpaper letter boards |
What the work teaches
Direct aim. To associate each letter shape with its sound, and to learn the movement used to write it.
Indirect aims, the ones you will not see at once
- Preparation for writing through muscular memory of letter shapes
- Preparation for reading through sound-symbol association
- Light, controlled touch
- Clear speech. Montessori used the letter sounds to notice which sounds a child still said imperfectly
Set it out before you invite the child
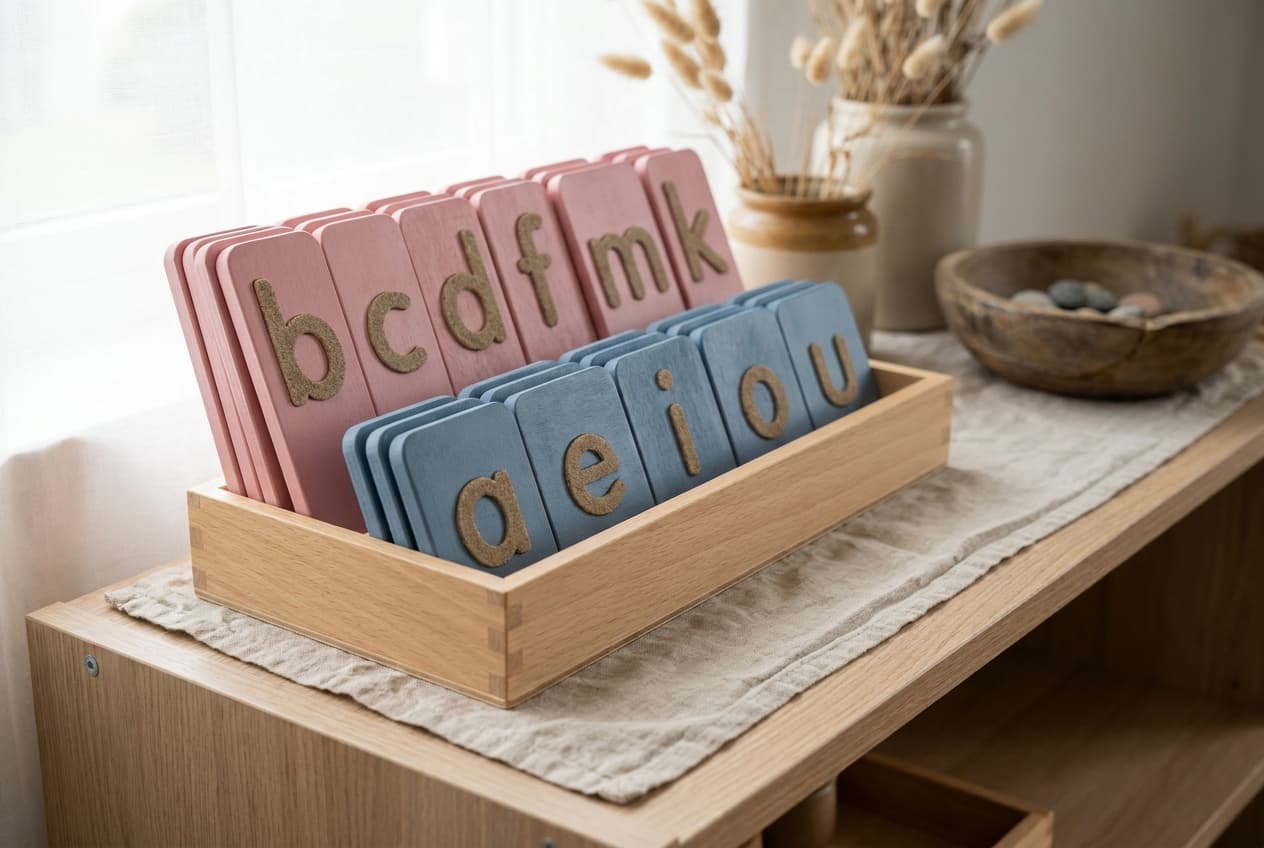
One board per letter, each cut to suit its letter, with the letter in fine sandpaper. Most sets today put vowels on blue boards and consonants on pink or red.
Montessori's 1912 cards did it the other way round in tone: vowels in light sandpaper on dark cards, consonants in black sandpaper on white. Either works if the two groups differ.
Larger cards with groups of letters that look alike or contrast, for later comparison.
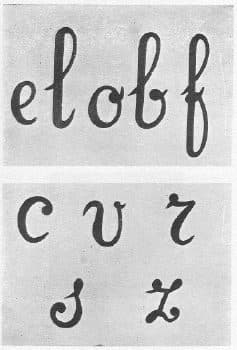
Choose print or cursive and match it to the moveable alphabet you'll use next. Montessori cut hers in the vertical script of Italian schools.
Wash hands first. Montessori had children wash with soap and water before every touch exercise, so the fingertips feel the grit.
Presentation, step by step
- 1Before this lesson, play oral sound games such as "I spy something that starts with /m/" until the child can hear initial sounds.
- 2Choose two or three letters that look and sound different, such as m and a. Sit beside the child at a table.
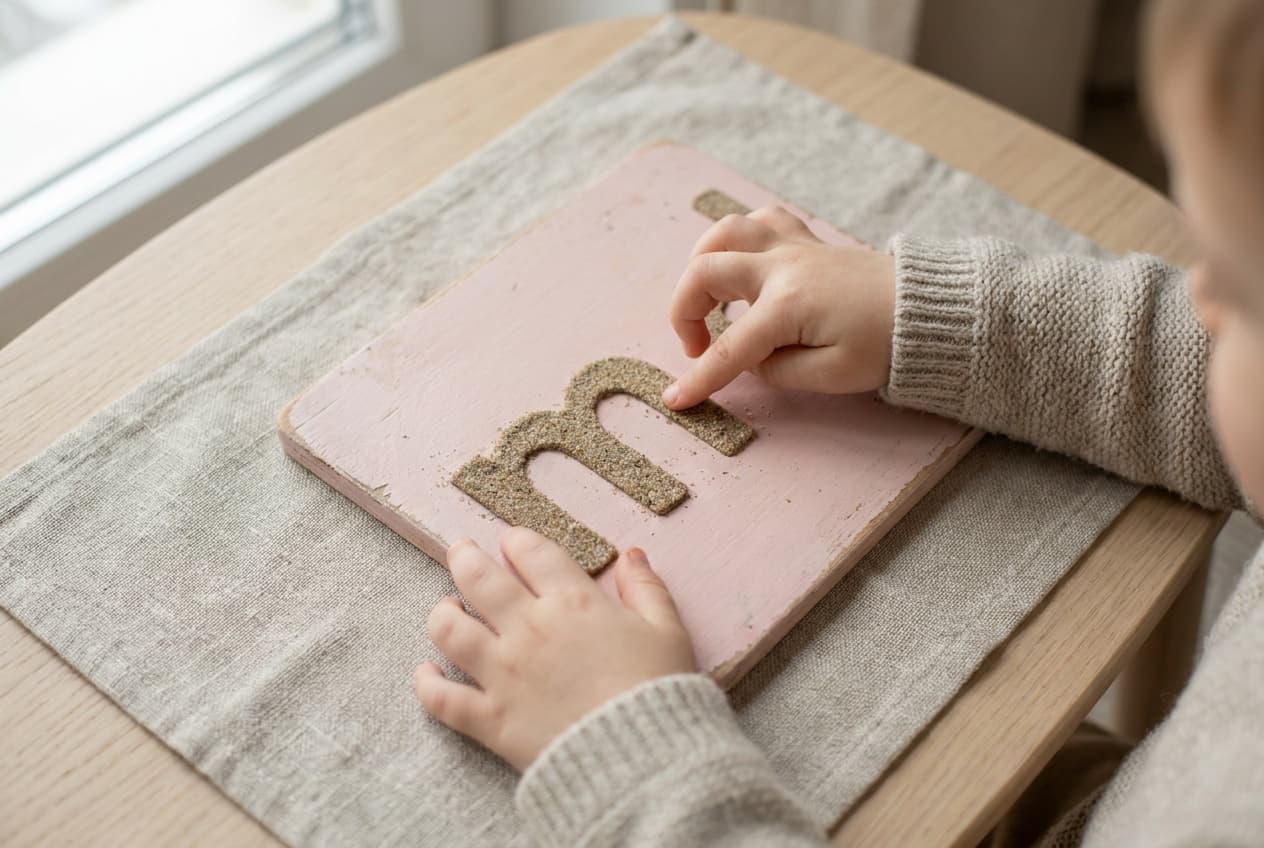
- 3Hold the board steady with your non-dominant hand. With the first two fingers of your dominant hand, trace the letter slowly in the direction it is written, then say its sound: "/m/." Use the sound, not the letter name.
- 4Trace and say the sound once more, then invite the child to trace and say it.
- 5Repeat with the other letters.
- 6Second period: "Show me /a/. Trace /t/." Third period: point to a letter and ask "What sound does this make?"
Details that hold the child's attention
The grit under the fingertips and the smooth board around it.
Tracing with eyes closed, which Montessori's children took up of their own accord.
Hearing the first sound of their own name and finding its letter.
Tracing the same letter in the air, with no board at all.
How the child sees a mistake
The rough surface. A finger that strays off the letter feels the smooth board right away.
The words come after the hands
| Words | Shown with |
|---|---|
| sound | What you say for each letter: /m/, /a/, /t/. Letter names come much later. |
| trace | Following the letter with two fingers in the direction it is written. |
| vowel, consonant | Adult words for the two board colors. The child can learn them later. |
| letter | The shape itself. |
The three-period lesson, scripted
You need two letters the child has traced, such as m and a.
| Period | What you do and say |
|---|---|
| 1. Naming | Trace m and say "/m/". Trace a and say "/a/". Have the child trace and say each one after you. |
| 2. Recognition | "Show me /a/." "Trace /m/." Change the order and ask again. |
| 3. Recall | Point to a letter and ask "What sound does this make?" |
If the child doesn't recognize the letters in the second period, end the lesson there and start again another day, without correcting. That was Montessori's rule: no insisting and no pointing out the error.
Extensions and variations
- Tracing the letter in a sand or salt tray after tracing the sandpaper
- Matching letters to small objects that begin with that sound
- Sandpaper phonograms (sh, ch, th, ee) once single sounds are secure
- Tracing with eyes closed, letting the sandpaper lead
- Sandpaper numerals, taught exactly the same way
Variations
- Print or cursive letters: choose one script and match it to the moveable alphabet you plan to use
- Consonants on pink or red boards and vowels on blue boards, which most sets follow
Make it or buy it
| Material | Make it | Buy, approx. |
|---|---|---|
| Sandpaper Letters | With effort | $32 to $113 |
Prices noted . Approximate US street prices for home-use versions; they vary by maker and change often, so recheck before buying.
Making it at home
Fine-grit sandpaper letters glued onto smooth card or thin board work well. Use a printed template so letter shapes are consistent, and keep consonant and vowel board colors distinct.
What to check when buying a set
Decide print or cursive and lowercase first. Check the font matches the moveable alphabet you will use next.
Printables for this age
This work needs only the material, so it has no printable of its own. The shelf plan below places it among the other works for the same age.
- Shelf plan for age 2PDF, 1 page, 325 KBEvery work for this age on one page, in order, with a column to date each presentation.
Every printable for one age, by email
The shelf plan and the lesson printables for your child's age in one email, then three short emails on the first lesson, what to make or buy, and what comes next.
Signs the child is ready, and signs it is done
Ready for the first presentation
- Hears and says the first sound of a spoken word in I spy.
- Touches lightly. Rough and smooth boards, done well, are good practice.
- Sits beside you for five minutes on one thing.
- Notices letters in the world and asks what they say.
Ready for the next lesson
- Gives the sound for every letter in the set on sight.
- Traces each letter in the direction it is written, without guidance.
- Finds the letter for the first sound of a spoken word.
- Asks to build words, which is the cue for the moveable alphabet.
Fitting it into a home, not a classroom
| If you have | Do this |
|---|---|
| A tight budget | Make them. Fine sandpaper letters cut from a printed template and glued to card cost a few dollars and an evening or two. |
| Two children | Separate lessons. Montessori's three periods depend on one child's answers, and an older sibling will answer first. |
| A child who already knows letter names | Keep the names and add the sounds: "Its name is em. It says /m/." Then use only sounds during the lessons. |
| A language that isn't spelled the way it sounds | English has many spellings for one sound. Start with the single sounds, then add phonograms such as sh and ee on their own boards. |
When it does not go to plan
| When | Try this |
|---|---|
| The child says "em" instead of /m/. | Say the sound clearly once more and move on. Repetition fixes it faster than correction. |
| Scrubbing the letter hard with one finger. | Show the light touch again, two fingers, hand raised as if touching the rough and smooth boards. |
| Tracing in the wrong direction. | Guide the two fingers over the letter once, in the writing direction, as Montessori did, then let the child try alone. |
| Interest fades after one letter. | Stop. Return another day with a letter from the child's own name. |
Hazards to check before each session
Use fine-grit paper. Coarse grit scrapes small fingertips raw when a child traces twenty letters in a row.
Check homemade letters for lifting edges and glue them back down before the next lesson.
Where other sequences and standards place it
We have not bought the paid homeschool curricula, so they are not listed here.
| Framework | Where it sits |
|---|---|
| This site's Language sequence | Lesson 1 of 12 published, before Sandpaper Numerals and Moveable Alphabet: Building First Words. Checked in: the scope and sequence |
| Montessori, The Montessori Method (1912) | The second period of writing, after the metal insets prepare the hand. In the fourth grade of the sequence the child begins to touch some sandpaper letters. Checked in: Chapter XVII, Description of the Method; Chapter XX, Sequence of Exercises |
| Montessori, Dr. Montessori's Own Handbook (1914) | Exercises for the writing of alphabetical signs, taught in three periods and serving both writing and reading. Checked in: Writing |
| Common Core, Kindergarten reading | RF.K.3.a: produce the primary sound or many of the most frequent sounds for each consonant. RF.K.1.d: recognize and name all upper- and lowercase letters, which comes after the sounds here. Checked in: corestandards.org |
| Head Start Early Learning Outcomes Framework, preschool | P-LIT 3: the child identifies letters of the alphabet and produces correct sounds associated with letters. Checked in: www.in.gov |
Sandpaper Letters: questions parents ask
What age are sandpaper letters for?
From about 3, once a child can hear the first sound of a spoken word. Montessori's children used them before writing, which most of her children began at about 4. Some start younger out of interest, and that's fine.
How can I teach sandpaper letters in a Montessori way?
Two or three letters at a time, sounds only, in three periods: trace and say "/m/", then "Show me /m/", then "What sound is this?" Sit beside the child, trace slowly with two fingers in the direction of writing, and stop the moment interest fades.
How do I make sandpaper letters for Montessori teaching?
Print a lowercase template in the script you'll use, trace it onto the back of fine sandpaper (reversed), cut it out and glue it to smooth card. Use one board color for vowels and another for consonants.
What is the purpose of sandpaper letters in Montessori?
The child sees the letter and says its sound while the fingers learn the movement of writing it. Montessori found the muscle memory the most lasting part. A child would sometimes recognize a letter by touch before recognizing it by sight.
How does the Montessori method teach the alphabet?
Sounds first, through sandpaper letters, then word building with a moveable alphabet, then reading. Letter names come later. Montessori found writing came before reading for most of her children.
Sources cited by book and chapter
- Maria Montessori, The Montessori Method (1912)
Chapter XVII, Second Period
Cards with single letters of the alphabet mounted in sandpaper; the vowels in light-coloured sandpaper on dark cards, the consonants in black sandpaper on white cards.
Vowels are taught first and then consonants, giving the sound and not the name; the child traces the letter in the direction of writing, and the smoothness of the card warns him when his finger strays.
Children trace the letters with closed eyes, so the muscular memory guides the hand, and some recognize a letter by touching it before they can by looking.
If the child does not recognize the letters, the lesson is ended and resumed another day, without revealing the error.
Chapter XVII, Reading
Almost all the children begin to write at four years and at five know how to read and write.
- Maria Montessori, Dr. Montessori's Own Handbook (1914)
Writing
Children touch the sandpaper letters as though writing, with the tips of the index and middle fingers and the hand raised as when they touched the rough and smooth surfaces.
Touching the sandpaper letters while the teacher gives their sounds, in three periods, prepares both the movements of writing and the recognition of letters for reading.
Sensory Education
The child already knows how to wash his hands with cold water and soap before the exercises with the board of rough and smooth surfaces.
Reviewed by
What to offer next
Once the child chooses this work unprompted and finishes it without help, the next lesson to prepare is Sandpaper Numerals.
- Sandpaper Letters2.5 to 5 years
- Sound games2.5 to 4.5 years
- Moveable alphabet3.5 to 6 years
- Metal Insets3.5 to 6 years
- Pink series4 to 6 years