Small Pouring Pitchers
Small pouring pitchers are a matched pair of jugs that a child of 18 months to 3.5 pours between, first with dried beans and later with water. On October 2, 2026 we found them from $3.95 for one stainless creamer to $33.99 for a boxed set with a tray. Kitchen creamer jugs work just as well.
It is used in 4 lessons, starting with dry pouring between two pitchers; 3 are published and the other 1 are in preparation. Not sure your child is ready for it? Two minutes of questions place your child on the sequence.
| Area | Practical Life |
|---|---|
| Used in | |
| From age | 18 months to 3.5 years |
| Make it | Easy to make at home |
| Buy it | About $8 to $34 (noted ) |
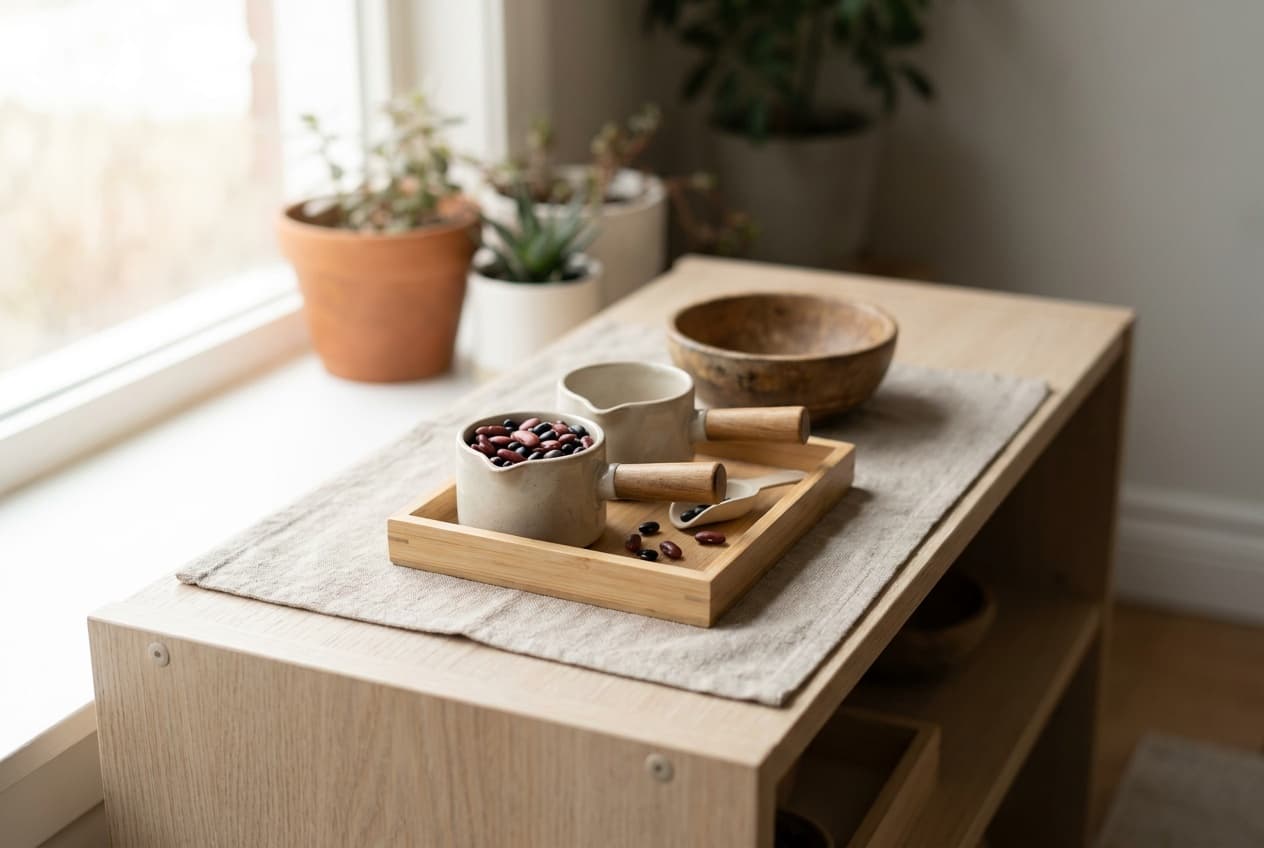
What the small pouring pitchers are for
The pair lets a child move something from one container to another and back again. The second pour undoes the first, so the work can repeat as long as the child wants. Beans come first; water comes once the pour is steady. The same small pitcher later fills the land and water form trays.
Pouring as a shelf exercise belongs to later Montessori practice; Alison's Montessori sells it as a "pitcher to pitcher pouring activity." Montessori's 1912 book has the root of it: a low washstand with small pitchers and basins, where children carried and poured water to wash.
| Part | What it looks like |
|---|---|
| Two pitchers | Matching, with a handle the whole hand fits through; the ones we checked hold 90 ml to half a quart |
| Tray | Rimmed, about 30 by 20 cm, to catch what misses |
| Filling | Large dried beans or chickpeas, then rice, then water |
| Sponge | For water work; Alison's set includes one |
The lessons that use the small pouring pitchers
Dry Pouring Between Two Pitchers
18 months to 3.5 yearsPouring rice or dried beans from one small pitcher into another on a tray, the classic first pouring lesson.
Wet Pouring Between Two Pitchers
2 to 4 yearsPouring water from one small pitcher to another on a tray, and wiping up drips with a sponge, the step after pouring beans.
Land and Water Forms
3 to 5.5 yearsPouring water into shallow trays that model an island and a lake, a peninsula and a gulf, and other paired forms, so a child can see each one in three dimensions.
- Pouring water into a glassIn preparation
Buying one: 3 listings checked October 2, 2026
| Seller and set | Made of | Price |
|---|---|---|
| Montessori OutletMini Creamer (510200200)Price is for one; a pair costs $7.90. Holds up to 90 ml, 8.5 cm long. In stock. | Stainless steel | $3.95 |
| Alison's MontessoriPitcher to Pitcher Pouring Activity (P74)Two lidded half-quart pitchers on a plastic tray 12.5 by 8.25 inches, with a sponge. | Not stated | $33.99 |
| The Montessori RoomMontessori Wet Pouring ActivityCanadian store. Two 12 oz pitchers and an 8.3 by 5.1 inch tray. | Stainless steel pitchers, melamine tray | $46.99 CAD |
- Two of the Montessori Outlet creamers cost $7.90 and do everything the $33.99 set does. The set adds a tray and a sponge, and its pitchers have lids.
- Size matters more than brand. Pick a pitcher the child can lift one-handed when it's a third full; a heavier one gets tipped with two hands and spills over the lip.
- Nienhuis lists only a 21 cm metal pitcher, too big for a first pour, and Kid Advance's pouring pages returned an error, so neither is in the table.
Making the small pouring pitchers at home
What to gather
- Two matching creamer or milk jugs from a kitchen shop, 200 to 250 ml each
- A rimmed tray about 30 by 20 cm
- A cup of large dried beans or chickpeas, kept in a lidded jar
- A small sponge, for when you move on to water
- A dot of nail polish or a strip of tape for a fill line
| Piece | Size and marking | How many |
|---|---|---|
| Pitchers | 200 to 250 ml, light enough to lift one-handed a third full | 2 |
| Tray | About 30 by 20 cm, rim at least 1.5 cm | 1 |
| Fill line | A third of the way up one pitcher | 1 |
- 1Put a third of a cup of beans in each jug and lift it by the handle. If it tips your wrist, it will tip a child's.
- 2Mark the one-third line inside one jug with nail polish, so the child can refill it alone later.
- 3Set the full jug on the left and the empty one on the right, handles turned toward the child's pouring hand.
- 4Keep the beans in a jar beside the tray on the shelf and refill from it, not from the kitchen bag.
Keeping a full set on the shelf
- Count the beans back into the jar after each session if a child under 3 is near. Rice, beans and chickpeas are all choking-size.
- Dry the pitchers inside and out after water work. A damp pitcher put back on a wooden shelf leaves a ring.
Questions parents ask about the small pouring pitchers
What are the activities of practical life?
Everyday tasks done with real tools: pouring, washing hands, buttoning, sweeping, laying the table. Montessori's 1914 Handbook lists children sweeping, dusting, laying the table and washing up. Pouring between two pitchers is one of the first, because it needs only two jugs and a tray.
Should the pitchers be glass or metal?
Either, or ceramic. A breakable jug shows a child why to pour with care, and it's fine with an adult in the room. Metal suits a child who still drops things.
When does a child move from beans to water?
When the beans stop landing on the tray. Water splashes and won't stay where it falls, so the dry pour should be steady first.
The Practical Life lessons page shows where the small pouring pitchers sits in the order.